If you’ve ever found yourself out on the water, casting your line and waiting anxiously for a bite, you know the frustration of having to constantly hold onto your fishing rod.
But fear not, fellow angler, for there is a solution to this age-old problem: a DIY fishing rod holder. As the saying goes, ‘Give a man a fish, and you feed him for a day. Teach a man to make a fishing rod holder, and he can fish for a lifetime.’
In this detailed guide, we will walk you through the process of creating your very own fishing rod holder using simple materials that you probably already have lying around.
From measuring and cutting the PVC pipes to assembling the base and rod holders, we’ll provide you with step-by-step instructions that are easy to follow.
So, grab your tools and get ready to improve your fishing experience with a custom-made rod holder that will make your days on the water more enjoyable.
Table of Contents
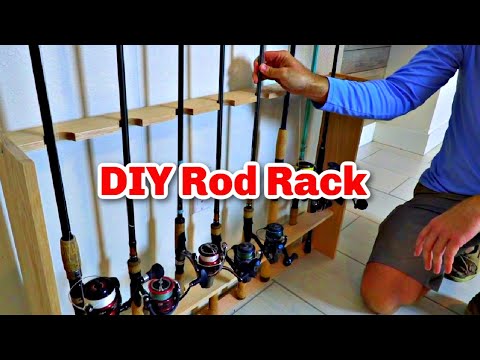
Related Video: "How To Make Your Own Fishing DIY Rod Rack (Step-By-Step)" by Salt Strong
Key Takeaways
– DIY fishing rod holders can be easily made using PVC pipes and connectors.
– There are different types of rod holders available, such as flush mount, clamp-on, adjustable, in-gunnel, and rail mount.
– Regular maintenance and cleaning of the rod holder is important for its durability and functionality.
– Rod holders can be customized with paint, camouflage tape, stickers, or decals to suit personal preferences and fishing style.
Gather the Necessary Materials
Before you begin, make sure you have all the materials you’ll need to construct your fishing rod holder. Choosing the right fishing rod holder materials is essential for a successful DIY project.
Firstly, you’ll need PVC pipes, which are durable, affordable, and easy to work with. Opt for pipes that are at least 1.5 inches in diameter to ensure they can hold your fishing rods securely. Additionally, you will need PVC connectors, such as tee connectors and elbow connectors, to assemble the holder. These connectors allow you to create the desired shape and angle for your rod holder. Don’t forget to grab some PVC glue to ensure a strong bond between the pipes and connectors.
Now that you have gathered all the necessary materials, it’s time to organize your fishing gear. Start by identifying the number of fishing rods you want to store in the holder. This will help you determine the length and number of PVC pipes needed. Consider organizing your gear based on rod length or fishing technique for easy access. You can also add hooks or clips to the holder to hang additional equipment, such as nets or tackle bags.
With all your materials ready, it’s time to measure and cut the PVC pipes.
Measure and Cut the PVC Pipes
After determining the desired length, go ahead and trim the PVC pipes accordingly. PVC pipe sizing options are crucial in this step, as they will determine the overall stability and functionality of your fishing rod holder. There are various sizes available, such as 1 inch, 1.5 inches, and 2 inches, with each offering different strengths and capacities. Carefully consider the weight and size of your fishing rods to choose the appropriate PVC pipe size.
Cutting techniques for PVC pipes are essential to ensure precise and clean cuts. One method is to use a PVC pipe cutter, which provides a straight and even cut. Another option is a hacksaw, which can be used by marking the desired length on the pipe and cutting carefully. Remember to wear safety goggles and gloves to protect yourself during the cutting process.
Once you have measured and cut the PVC pipes to the desired length, you are ready to move on to the next step: assembling the base and rod holders. This will involve connecting the pipes using PVC connectors and creating a stable structure that can hold multiple fishing rods securely.
Assemble the Base and Rod Holders
To start assembling, first connect the PVC pipes using connectors to create a sturdy base and secure holders for your fishing rods. There are different types of fishing rod holders that you can choose from, depending on your needs and preferences. Some popular options include flush mount rod holders, clamp-on rod holders, and adjustable rod holders. Consider the type of fishing you’ll be doing and the number of rods you want to hold when selecting the rod holders for your DIY fishing rod holder.
Once you have connected the PVC pipes and created the base, it’s time to paint and decorate your fishing rod holder. This step is optional but can add a personal touch to your creation. Choose a durable paint that is suitable for outdoor use and matches your style. You can also add stickers or decals to customize the look of your fishing rod holder.
After you have finished painting and decorating, you can move on to securing the rod holder to your desired location. This will ensure that your fishing rods are safe and secure while you’re out on the water.
Secure the Rod Holder
Now it’s time for you to ensure that your fishing rods are securely held in place by attaching and fastening the rod holder to your desired location. To help you understand the different types of fishing rod holders and their benefits, take a look at the table below:
| Type of Rod Holder | Benefits |
|---|---|
| Clamp-On Rod Holder | Easy to install and remove, versatile for different locations |
| Flush Mount Rod Holder | Provides a clean and sleek look, ideal for permanent installations |
| In-Gunnel Rod Holder | Maximizes deck space, keeps rods within reach |
| Rail Mount Rod Holder | Allows for adjustable positioning, great for boats with railings |
Maintaining and cleaning your fishing rod holder is essential for its longevity and performance. Here are a few tips to keep in mind:
1. Regularly check for any loose screws or bolts and tighten them if necessary.
2. Clean the rod holder with fresh water and mild soap after each use to remove any salt or dirt.
3. Avoid using harsh chemicals or abrasive materials that could damage the holder’s finish.
4. Store the rod holder in a dry place to prevent rust or corrosion.
With your rod holder securely in place, it’s time to customize and test it to ensure it meets your fishing needs.
Customize and Test Your Fishing Rod Holder
Get creative and add some personal touches to your newly secured fishing rod holder – it’s time to make it uniquely yours!
One way to customize your fishing rod holder is by painting it with your favorite colors or patterns. You can use waterproof paint to ensure its longevity.
Another option is to wrap it with camouflage tape, making it blend in with your fishing environment.
Additionally, you can attach stickers or decals that represent your favorite fishing brands or catch phrases.
Testing your fishing rod holder is essential to ensure its durability and functionality.
To test it, place your fishing rod in the holder and give it a gentle shake. If the rod feels secure and stable, you’re off to a good start.
Next, simulate the movements you would make while fishing, such as casting and reeling in. Pay attention to any wobbling or shifting of the rod holder.
If it remains steady and doesn’t hinder your fishing experience, you’ve successfully customized and tested your fishing rod holder.
If you’re feeling adventurous, you can also experiment with alternative materials for your rod holder. Instead of using PVC pipes, you could try using metal or wooden dowels. Just make sure the material you choose is sturdy enough to hold your fishing rod securely.
Remember, the goal is to create a personalized fishing rod holder that suits your preferences and fishing style.
Frequently Asked Questions
How much weight can the fishing rod holder support?
The maximum weight capacity of a fishing rod holder depends on the specific model and design. When choosing one, consider the type of fishing technique you’ll be using to ensure it can support the weight of your rod and reel.
Can I use a different material instead of PVC pipes for the rod holders?
Yes, there are alternative materials you can use for fishing rod holders. Some popular options include using ABS pipes, metal tubes, or even repurposing old broom handles. Each material has its pros and cons, so choose one that suits your needs.
How long does it take for the adhesive to dry when assembling the base and rod holders?
To properly apply adhesive when assembling the fishing rod holder base and rod holders, follow these tips for a secure and durable bond. Apply the adhesive evenly and allow it to dry completely according to the manufacturer’s instructions.
Can I adjust the angle of the rod holder once it is secured?
Yes, you can easily adjust the angle of the rod holder once it’s secured. Remember, “Aim high, but start low.” The adjustability of the rod holder angle greatly impacts your fishing success, allowing you to position your rod for optimal bait presentation and hooking efficiency.
Can I paint the fishing rod holder to match my fishing gear?
Yes, you can paint the fishing rod holder to match your fishing gear. There are various painting options available, such as spray paints or brush-on paints. Additionally, you can use alternative materials like vinyl wraps for a customized look.

