Imagine casting your line out into the water, the sun shining down on your face as you patiently wait for a bite. But suddenly, disaster strikes – the tip of your fishing rod snaps off, leaving you unable to reel in any fish.
Don’t worry, though, because in this article, you’ll learn how to repair a fishing rod tip and get back to your peaceful angling adventures.
Using a second person point of view, I will guide you through the process step by step, ensuring that you have all the necessary tools and materials to complete the repair.
We’ll start by assessing the damage and then move on to removing the damaged tip. Once that’s done, we’ll attach a new tip and test the repair to make any necessary adjustments.
By the end of this article, you’ll be equipped with the knowledge and skills to fix your fishing rod tip and get back out on the water in no time.
Table of Contents
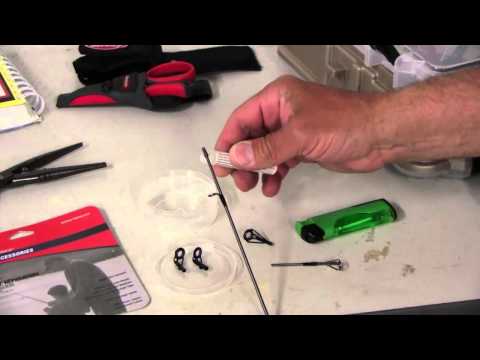
Related Video: "How to Repair Broken Fishing Rod Tips" by Wired2Fish
Key Takeaways
– Importance of being able to reel in fish
– Step-by-step guide for repairing a fishing rod tip
– Techniques for preventing fishing rod tip damage
– Common causes of damage and how to avoid them
Assess the Damage
Take a close look at the fishing rod tip to see if there are any cracks or breaks. This is crucial in determining the extent of the damage and the necessary steps for repair.
Techniques for preventing fishing rod tip damage can save you from having to deal with this issue in the first place. One effective technique is to always use a rod tip protector when storing or transporting your fishing rod. This simple accessory provides an extra layer of protection against accidental impacts or rough handling. Additionally, be mindful of how you handle your rod while fishing. Avoid any sudden jerks or excessive force that could potentially damage the delicate tip.
Understanding the common causes of fishing rod tip damage and how to avoid them is also essential. For example, avoid high-tension situations such as hooking onto a snag or getting your line caught in a tree branch. By being aware of these potential hazards, you can prevent unnecessary damage to your rod tip.
Now that you have assessed the damage and understand how to prevent it, it’s time to gather the necessary tools and materials for the repair process.
Gather the Necessary Tools and Materials
First, you’ll need to gather all the tools and materials necessary to fix the damaged end of the fishing pole. Start by finding the right fishing rod tip replacement. Measure the diameter of your fishing rod to ensure that you purchase a replacement tip that fits perfectly. Look for a tip made of the same material as your original one, whether it is ceramic, metal, or plastic.
In addition to the replacement tip, you will need some other tools and materials. Grab a small tube of epoxy glue, which will be used to secure the new tip onto the rod. You’ll also need a small file or sandpaper to smooth out any rough edges on the rod before attaching the new tip.
Now, let’s talk about some tips for preventing fishing rod tip damage in the future. Avoid placing excessive pressure on the tip when casting or reeling in your line. Always be mindful of any obstacles that could potentially snag or bend the tip. Additionally, consider investing in a rod tip protector, which can provide an extra layer of protection.
With all the necessary tools and materials gathered, you are now ready to move on to the next step. Remove the damaged tip and prepare the rod for the replacement.
Remove the Damaged Tip
Now that you have all your tools and materials in hand, it’s time to bid farewell to the broken tip and prepare for a fresh beginning. Removing the damaged tip requires a proper technique to ensure a successful repair. Here’s a step-by-step guide to help you through the process:
| Step | Instructions |
|---|---|
| 1. | Carefully examine the damaged tip to determine how it’s attached to the rod. It could be held in place by adhesive, thread wraps, or a combination of both. |
| 2. | If there are thread wraps, use a razor blade or a craft knife to gently cut through them. Be cautious not to damage the rod or remove too much material. |
| 3. | If adhesive was used, apply heat to loosen it. A heat gun or a hairdryer on high heat can help soften the adhesive, making it easier to remove. |
| 4. | Once the tip is loose, gently twist and pull it off the rod. If it doesn’t come off easily, apply more heat or carefully use pliers to assist in the removal process. |
Proper technique is crucial to avoid causing further damage to your fishing rod. Common mistakes include using excessive force, which can lead to the rod breaking, or not using enough heat to loosen the adhesive, making removal difficult. Once you have successfully removed the damaged tip, you can proceed to the next step of attaching the new tip.
Now, let’s move on to the next section and learn how to attach the new tip.
Attach the New Tip
Once you’ve successfully removed the damaged tip, it’s time to securely fasten the new tip to your fishing rod. Proper positioning of the new tip is crucial to ensure a strong and effective repair. Start by aligning the new tip with the rod’s blank, making sure it is centered and straight. This will help maintain the rod’s balance and improve its overall performance.
When it comes to selecting the right glue for attaching the new tip, it’s important to choose a strong adhesive that is specifically designed for rod repairs. Epoxy resin or rod bonding glue are both excellent options. Apply a small amount of glue to the rod blank and spread it evenly around the area where the new tip will be attached. Make sure to cover the entire surface for maximum adhesion.
Once the glue is applied, carefully press the new tip onto the rod blank. Hold it firmly in place for a few minutes to allow the glue to bond properly. It’s important to follow the manufacturer’s instructions for drying time to ensure a secure attachment.
With the new tip securely fastened, you can now move on to the next step of testing the repair and making any necessary adjustments.
Test the Repair and Make Adjustments
After securely fastening the new tip, it’s important to test the repair and make any necessary adjustments before heading out to the water. Start by inspecting the new tip to ensure it is firmly attached and aligned with the rod. Give it a gentle tug to check for any movement or wobbling. If everything looks secure, proceed to the next step.
Troubleshooting common issues is essential to ensure the effectiveness of the repair. Test the flexibility of the rod by gently bending it to see if it feels sturdy and responsive. Pay attention to any unusual sounds or vibrations that could indicate a problem. Additionally, check the guides along the rod to make sure they are properly aligned and not damaged.
If you encounter any issues during your test, explore alternative repair methods. One option is to remove the new tip and reattach it using a different adhesive or technique. You may also consider replacing the entire rod tip if the repair is not holding up well. Experimenting with different methods can help you find the best solution for your specific rod and repair needs.
By thoroughly testing the repair and troubleshooting any issues, you can ensure that your fishing rod is in optimal condition for your next fishing adventure.
Frequently Asked Questions
How often should I check and repair my fishing rod tip?
Regularly inspecting and repairing your fishing rod tip is crucial for the proper maintenance of your equipment. Check for any signs of damage, such as cracks or wear, and address them promptly to ensure optimal performance and prevent further issues.
Can I use any type of adhesive to attach the new tip?
To properly attach a new fishing rod tip, it is important to use adhesives specifically designed for this purpose. Avoid using just any adhesive, as it may not provide the necessary strength. Before applying the adhesive, clean and prepare the tip by removing any debris or old adhesive residue.
What are some common signs of a damaged fishing rod tip?
To properly inspect a fishing rod for potential damage, look out for common signs of a damaged fishing rod tip. Keep an eye out for frayed or broken guides, cracks, or chips on the tip.
Is it possible to repair a fishing rod tip without replacing it?
Yes, it is possible to repair a fishing rod tip without replacing it. There are alternative repair methods available, such as using a rod tip repair kit or reattaching the broken piece. Additionally, taking preventative measures can help avoid future damage.
Are there any specific safety precautions I should take while repairing a fishing rod tip?
To ensure your safety while repairing a fishing rod tip, always wear protective gloves and safety glasses. Use a rod tip repair kit, which typically includes a replacement tip, epoxy adhesive, and a small file.
