Are you tired of your fishing rods cluttering up your garage or taking up precious space in your boat? Look no further! In this article, we will provide you with detailed DIY woodworking plans for a fishing rod holder that will help you organize your gear and save valuable space.
By following these step-by-step instructions, you will be able to create a customized fishing rod holder that suits your needs perfectly. Gather your materials and tools, measure and cut the wood pieces, and assemble the holder with ease.
With a little sanding and finishing, your fishing rod holder will not only be functional but also aesthetically pleasing.
Don’t waste your time and money on store-bought solutions that may not fit your specific requirements. With our detailed plans, you can confidently tackle this project and enjoy the satisfaction of creating something with your own hands.
Get ready to organize your fishing rods and make your fishing trips more enjoyable than ever!
Table of Contents
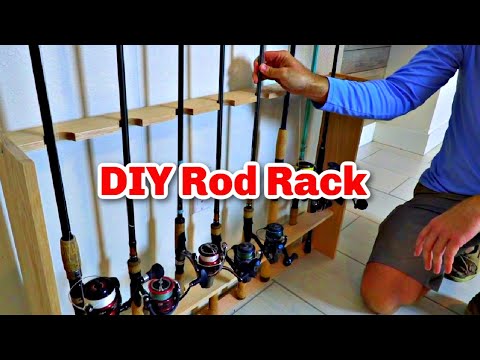
Related Video: "How To Make Your Own Fishing DIY Rod Rack (Step-By-Step)" by Salt Strong
Key Takeaways
– DIY woodworking plans for fishing rod holders help organize fishing rods and save space.
– Fishing rod holders can be customized to suit individual needs and can be made from strong and sturdy wood like oak or cedar.
– Essential tools for making a fishing rod holder include a measuring tape, saw, drill, and screwdriver.
– Fishing rod holders come in different types such as vertical, horizontal, and ceiling-mounted, and can be customized with storage compartments or decorative elements.
Gather Your Materials and Tools
Now it’s time for you to roll up your sleeves and gather all the materials and tools you’ll need to bring your fishing rod holder to life.
Choosing the right wood for your fishing rod holder is crucial for its durability and functionality. Opt for a strong and sturdy wood, such as oak or cedar, that can withstand the weight of multiple fishing rods. Additionally, consider using treated lumber to protect the wood from moisture, as fishing gear is often exposed to water.
In addition to the wood, you’ll need a few essential tools to complete this project. Grab a measuring tape to ensure accurate dimensions, a circular saw or a miter saw to cut the wood pieces, a drill with various drill bits for making holes, and a screwdriver to assemble the holder. Don’t forget to have sandpaper on hand to smooth out any rough edges and prepare the wood for finishing touches.
Before diving into the construction process, it’s essential to know a few tips for maintaining your fishing rods. Keep them clean and dry after each use to prevent rust and damage. Additionally, store them in a cool and dry place to prolong their lifespan.
Now that you have all the necessary materials and tools, let’s move on to the next step—measuring and cutting the wood pieces.
Measure and Cut the Wood Pieces
To start, take your measurements and carefully cut the wooden pieces to size, ensuring precision with each swipe of the saw. When cutting the wood, use a sharp saw and a straight edge to ensure clean and straight cuts. Take your time and follow your measurements precisely. If you make any mistakes, it’s always better to recut a piece than to compromise the integrity of the entire project.
Once all the pieces are cut, sand the edges to remove any roughness or splinters. Be sure to choose the right wood for your fishing rod holder. You’ll want a sturdy and durable wood that can withstand the weight of your rods and last for years to come. Popular choices include oak, pine, and cedar. Each wood has its own unique characteristics, so consider the look and feel you want for your holder.
With the wood pieces cut and sanded, you’re ready to move on to the next step: assembling the fishing rod holder.
Assemble the Fishing Rod Holder
To assemble the fishing rod holder, follow these steps:
1. Identify the different types of fishing rod holders available: vertical, horizontal, or ceiling-mounted. Choose the type that suits your needs.
2. Lay out the wooden pieces and arrange them according to your design. Make sure everything fits together properly.
3. Secure the pieces together using wood glue and screws. Apply plenty of glue to each joint for a strong bond. Use screws to reinforce the connection and add stability.
4. Customize your fishing rod holder by adding storage compartments or decorative elements. You can also paint or stain it to match your decor or personal style.
After assembling the fishing rod holder, sand and finish it to give it a polished look and protect the wood.
Sand and Finish the Holder
Once you’ve successfully crafted your elegant fishing rod storage solution, it’s time to show off your refined taste by sanding and finishing the holder to perfection. Sanding techniques are crucial to achieve a smooth and polished surface. Start by using coarse-grit sandpaper to remove any rough edges or imperfections. Gradually move to finer-grit sandpaper for a refined finish. Remember to sand with the grain of the wood to avoid scratches.
To create a visual representation of the sanding process, imagine a 3×3 table. In the first column, the wood is rough and uneven. As you progress to the second column, the surface becomes smoother and more even. Finally, in the last column, the wood appears polished and flawless. This step-by-step progression helps you visualize the transformation.
After sanding, it’s time to choose the right finish for your fishing rod holder. Consider the type of wood you used and the desired aesthetic. Some popular choices include varnish, lacquer, or paint. Each finish has its own application technique and drying time, so be sure to read the instructions carefully.
With the sanding and finishing complete, you can now move on to the next section about organizing your fishing rods. Create a functional and organized space to store your rods, ensuring easy access for your next fishing adventure.
Organize Your Fishing Rods
Get ready to transform your fishing gear chaos into a neat and organized display of your angling arsenal. Using a fishing rod holder can bring numerous benefits and make your fishing experience more enjoyable. Not only will it keep your fishing rods organized, but it will also protect them from damage.
There are different types of fishing rod holders available, so you can choose the one that suits your needs the best.
One of the main benefits of using a fishing rod holder is that it helps prevent tangles and knots in your fishing line. By keeping your rods separate and securely in place, you can avoid the frustrating task of untangling lines before casting. Additionally, a fishing rod holder can protect your rods from getting scratched or damaged, as they won’t be lying around or leaning against other objects.
There are several types of fishing rod holders to choose from. Wall-mounted holders are a popular choice, as they save space and keep your rods off the ground. They can be easily installed on the wall of your garage, shed, or fishing cabin. Another option is a freestanding rod rack, which is great for those who prefer to keep their fishing rods in a designated area. These racks can hold multiple rods and are often adjustable to accommodate different rod lengths.
In conclusion, using a fishing rod holder has many benefits, including preventing tangles and damage to your rods. With different types available, you can find the perfect holder to keep your fishing gear organized and easily accessible. So, why not invest in a fishing rod holder and take your fishing experience to the next level?
Frequently Asked Questions
How can I customize the fishing rod holder to fit my specific fishing rods?
To customize your fishing rod holder, measure the dimensions of your specific fishing rods. Use these measurements to modify the holder by adjusting the size of the slots or adding padding to ensure a secure fit.
Are there any alternative materials I can use instead of wood for the fishing rod holder?
You could explore alternative materials for a fishing rod holder, like PVC pipes or metal. PVC is affordable and easy to work with, but may not be as sturdy as wood. Metal can be durable, but may require more advanced tools and techniques to work with. Consider the pros and cons before making a decision.
What type of finish should I use to protect the wood and ensure longevity?
To ensure longevity and protect the wood, consider using different types of wood finishes. Some popular options include varnish, polyurethane, and lacquer. Varnish provides a glossy finish but requires multiple coats, while polyurethane offers durability. Lacquer dries quickly but may require professional application.
Can I mount the fishing rod holder on a boat or kayak?
Mounting a fishing rod holder on a boat or kayak has its pros and cons. On a boat, you’ll have more stability, but it may limit your movement. On a kayak, it’s more portable but less stable. Secure it tightly using straps or clamps for both options.
How do I prevent the fishing rods from slipping or falling out of the holder?
To prevent rod slippage and secure your fishing rods in the holder, you can install rubber or foam padding inside the slots to provide grip and cushioning. This will keep your rods in place even when the boat or kayak is in motion.
